

While looking for design inspiration for a jewelry box I've been working on,
I stumbled across this lovely idea.


It was so cool, I have never seen paper butterflies before!
(I love butterflies!)
After making enough for the jewelry box, I just had to make some more...
and I knew exactly where I would put them!
You probably want me to get on with instructions though,
Okie dokie!
What you'll need:
Paper
Scissors
A computer
And a printer
Well, I needed the computer and printer for a template to start with,
if you can freehand butterflies you can skip these next steps.
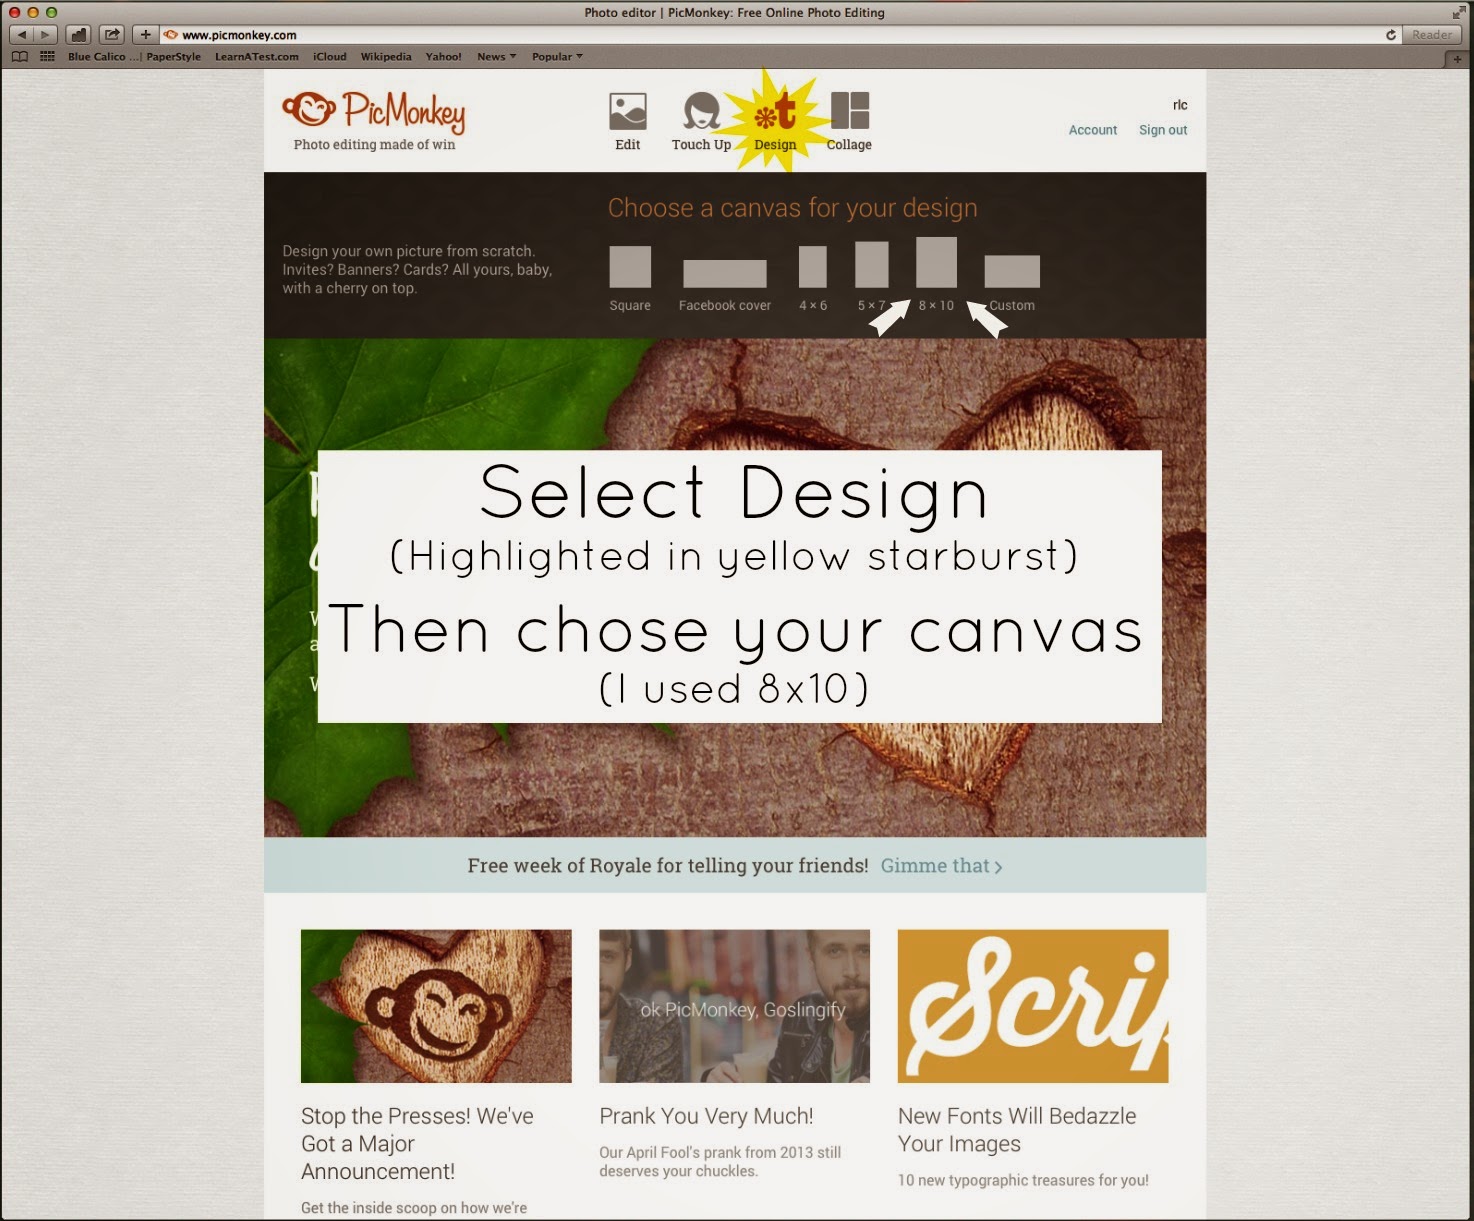
Go to: http://www.picmonkey.com
(It's my favorite photo editing site!)


After the picture is saved, print it out and carefully cut out the butterflies.


You can just cut off the antennas.
Alright, now fold the butterfly in half.
Make sure it's even, that is very important.

Now for the paper.
You could use any kind you want, get creative!
Scrapbook paper, old sheet music, pages from an old book no one wants :)
Or you could paint/draw your own designs.
We still had paper we used on the dresser collage, then I printed out some sheet music.

Take your piece of paper

fold it in half, printed side in

Now, take your butterfly and sandwich the paper in between it's wings-
like this:


Got that?
Good.
Pinching the paper tight so it doesn't wiggle out of place, cut around the butterfly pattern.

You don't have to do the exact outline, have fun with it!
I gave this one bigger scallops.
Be careful not to cut your pattern, you might need it for the next hundred butterflies :)

Once you've finished, unfold and tada!


Now you can use these however you want,
I've seen some adorable mobiles made from paper butterflies,
but I just used party tack to stick them to my wall :)


Wow! You made a lot of butterflies! Thanks for the instructions; it's amazing how something so beautiful can be made so easily!
ReplyDeleteYes, but I didn't make them all at one time. I've been working on them for a few weeks :)
DeleteYou're very welcome! I hope everything made sense.
Oh, beautiful! Wonderful! I bet those are great to see when you walk into a room. Thanks for the tutorial!
ReplyDelete