
by: Bethany
This upholstery project has been my second special order for someone (sorry, no pictures of the first). Finding pieces to fix up and sell is fun, but then there is finding buyers, and having space for a growing inventory.
This upholstery project has been my second special order for someone (sorry, no pictures of the first). Finding pieces to fix up and sell is fun, but then there is finding buyers, and having space for a growing inventory.
Doing a job for someone else has it's own challenges, but it's rewarding too.
When people ask, "Hey, I have this (insert type of furniture here). Would you be interested in taking a look at it?" it's almost like, "Your mission, should you choose to accept it…"
So, my mission was this:

I was told it was a Queen Anne style chair, but doing some research, I came up with pictures like this.

Similar, but not quite right…
I found that the style of the back of the chair is called "channel back", so looking into that deeper, I found this.

That was it!
The site said it was a 1940's Sam Moore chair. I don't know if Sam Moore was the designer, or just the name of the style.

The chair had been reupholstered before, so this wasn't the original fabric.

It was well loved, by both people, and cats. :)

So, the first step was disassembling the chair.


Pulling off the old fabric meant yanking out lots of staples, and ripping off pieces that were glued down.
All of the trim around the back of of chair was both stapled and glued.
Yup, lots of fun.


This part is actually my favorite. I love seeing the bare bones of the piece and how it was put together.
Now, I just had to remember how everything went, so I could put it back the right way. :)

The fabric my client (my boss, too) chose was a nice medium weight fabric called "Symphony Evening" from Warehouse Fabrics Inc.

It took 5 yards of it to do the chair.

The most complicated part was the channel back.
 |
| Burlap backing |

I took it apart section by section; numbering the batting pieces so I could put them back in the right order.


I used the old pieces for patterns.


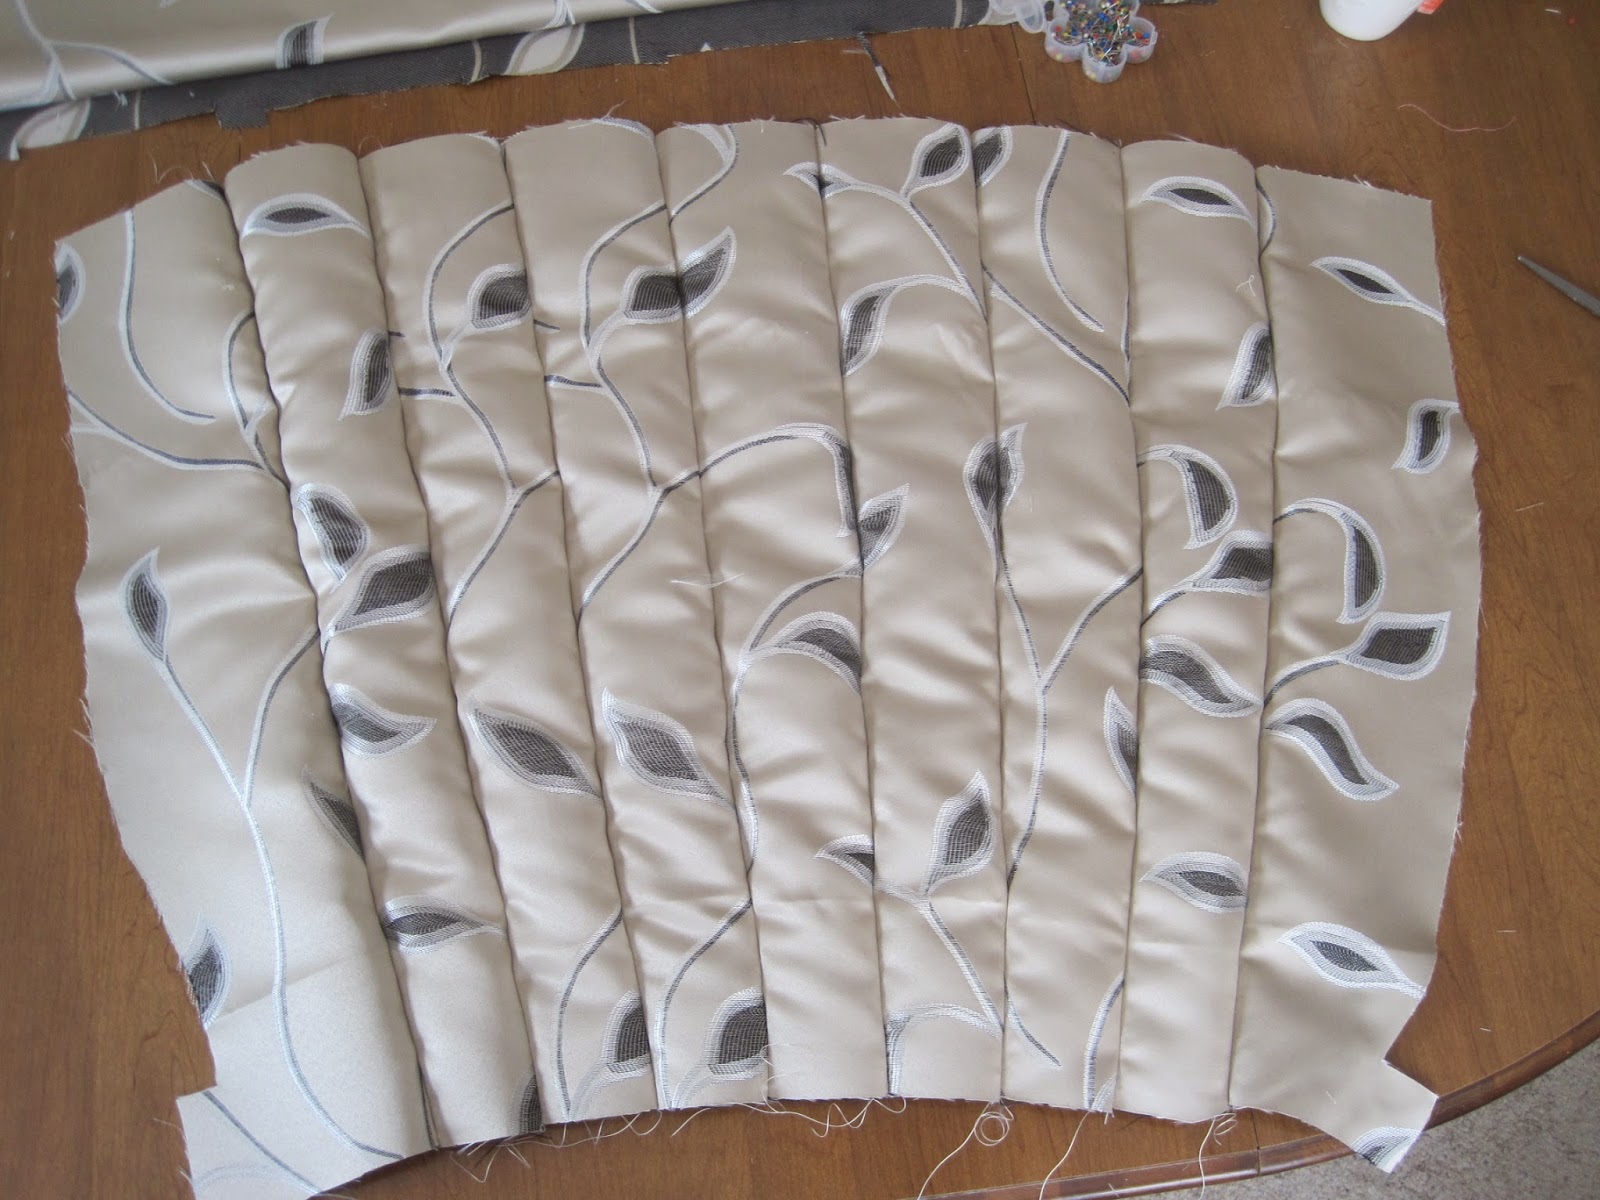
Once I had it sewed together, I replaced the batting and reattached the burlap.


The next step was replacing the batting on the arms of the chair.


Again, I used the old pieces of fabric for the pattern for the arms and front of the chair.
I also used a new piece of fabric to cover the batting on the seat.

Then I fit the back piece in, and stapled it in place.


I attached the back piece of fabric to the top first, and then around the sides of the arms.

A strip of cardboard helped guide where I put staples.
 |
| Folding the fabric around the arm. |
Then came the upholstery nails…. They were both fun and annoying. They give the piece a really elegant look, but they can be a little temperamental when you're nailing them in.

I went to lots of different hardware stores looking for the right kind of nail. I knew I wanted a dark finish to match the deep brown color in the fabric, but most stores only carried brass nails.
I found these nails at Walmart, but it was frustrating because they would only have two or three packages on the shelf at a time, and each package only had 24 tacks. So, I had to make quite a few trips to get all the nails I needed.
For the seat cushion, I made my own piping for the very first time.

After reading some tutorials, I found that there's actually a special sewing machine foot for piping, which I didn't have, so I made do with my zipper foot.
The difference is that the piping foot has a groove designed to follow the piping as you sew. With the zipper foot, I had to carefully guide the machine, but the foot allowed to sew right up besides it.
It was a fun learning experience.


All that was left now was to finish nailing the back!
 |
| My workspace = the dining room It's a very multi functional space. :) |


Everything seemed like it was done, and my boss was coming to pick it up, when I realized that I hadn't replaced the fabric on the bottom of the chair!

There we go!
 |
| Before |
 |
| After |
Mission: Accomplished.
You really did a great job! The finished product looks awesome!
ReplyDeleteThanks! I still have a lot to learn, but this gave me some good experience.
DeleteWow, that's really good!
ReplyDeleteThank you!
DeleteIncredible! I can't believe you know how to Becca! It looks absolutely perfect!
ReplyDeleteBlessings,
Jessica
The eldest sister & singer
Sorry for the mix up, but it was me. I forgot to log out of Becca's account before making the post. Oops!
DeleteWell, thanks! It's far from perfect, but I think it turned out pretty good.
This is beautiful! What a talent you have! I love all of the pictures you took of the entire project. How do you find the patience to put all of those upholstery nails around the back?!
ReplyDeleteThanks! Once I got going on the nails, it was kind of fun! The excitement of it being almost finished helped too.
DeleteThat looks like a lot of work...but wow! The finished project...that is amazing! Way to go!
ReplyDeleteThanks!
DeleteYikes! Staples and glue! That doesn't sound like a lot of fun.
ReplyDeleteWow, the finished product looks amazing! I think it's super cool that you and Becca know how to restore old/broken furniture. It's a great skill to have.
Very lovely!