
Last Spring, some friends who were moving gave me this little channel back chair.

It was such a cute shape, and as you may remember, I've reupholstered a similar chair before. (See this post here)
Well, it sat around our house for a bit, waiting patiently for the opportunity to work on it. This summer, I finally got the chance.
Picking out fabric was hard. Since it wasn't a special order, I didn't have someone else to chose it. I wanted something fun, yet would appeal to a lot of people and be easy to sell. After hours of searching, I came up with this:
 |
| Click to see fabric at Joann.com |
Coral and cream, a fun, interesting, yet not too busy pattern, and a pretty good price too.
Taking the chair apart held a few surprises. The first was that everything was tacked down with these itty bitty nails, instead of staples. Those were quite the joy to remove (not), but I reached the end of them eventually.
The second was that the red fabric was covering a pretty purple/burgundy velvet that was very worn, very dusty, but beautiful. The original fabric, maybe?

While stripping off the two layers of fabric, I found a few other surprises lost down between the seat cushion and the arms.


The grand totel was: 2 buttons, 3 crayon pieces, a binder clip, a rainbow pin, a tinker toy, a one-legged spaceman, and 6 cents. And since the nickel and penny are from the 1930's, that makes them worth a bit more. (around 55 cents altogether, since they're not in the best condition.)
If the chair was recovered during the Dust Bowl, that would certainly account for the dirt imbedded everywhere. :)
Also, the cardboard strips they used in certain areas were part of some kind of picture... maybe from a advertisement? An interesting way to recycle.

Finally all the fabric was off, and it was time to start putting the chair back together.

I also removed the legs and stained them a darker color.

Doing the channels the first time had been pretty slow going, so I did a little more researching. I found that instead of sewing the batting into each channel, one at a time, you can sew all the fabric first, and then stuff the batting in. It wasn't too much faster, but it was good to try a new technique.

I finished it off with black upholstery nails, and I think it turned out nice, if I do say so myself. :)


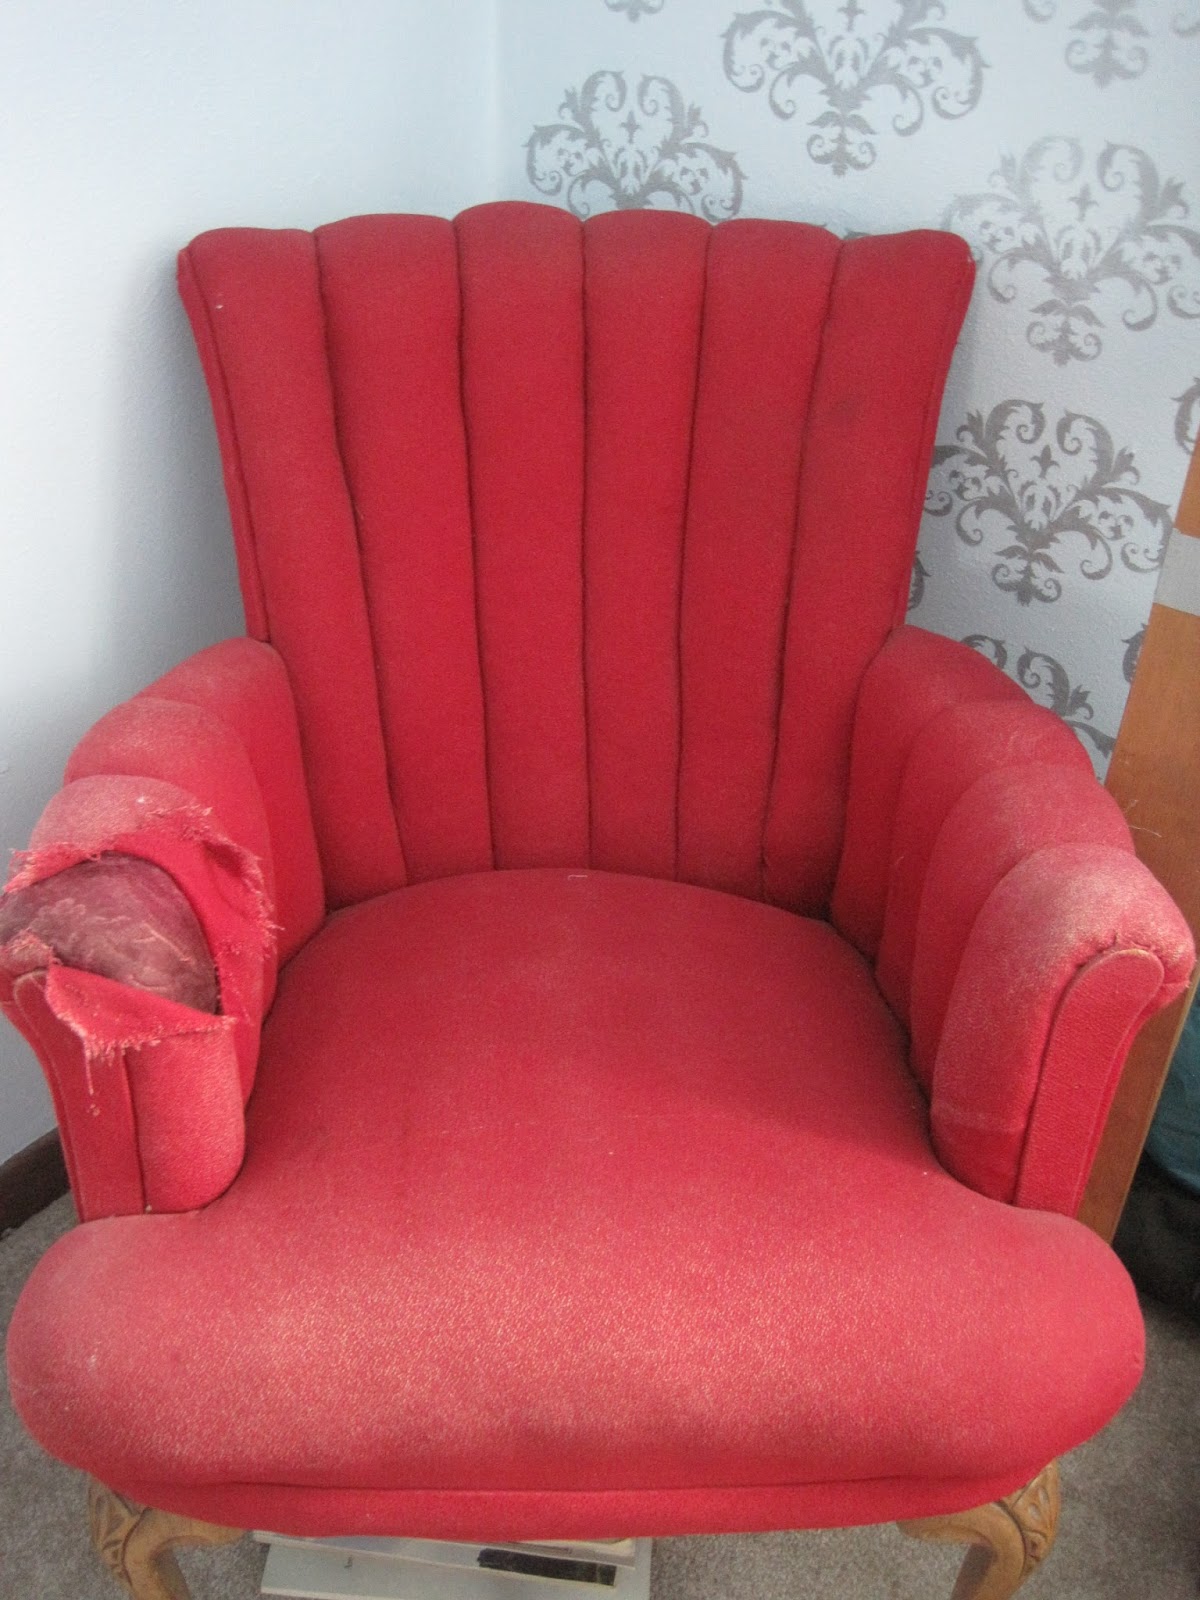 |
| Before |
 |
| After |
Oh goodness! How adorable it turned out! And what a fun adventure to find those old trinkets to boot!
ReplyDeleteThanks for sharing!
Cassie
of Calico Sisters blog
You have a great talent girl! The finished product is beautiful! I love seeing things like this that were once beautiful made so once more.
ReplyDeleteThis was beautifully done! I am going to attempt to reupholster one of my own bedroom chairs this summer, and I am a little but shy of doing such a "drastic" bit of work! Any time you girls put up a post on your reupholstering projects, I am always so delighted, because it gives me the courage to do it, and they are always so sarcastic and fun to read.
ReplyDeleteMuch love to you both, dearies!
Jessica, the eldest sister & singer
You always pick such cute fabric for your projects. And how fun to find some surprises in the chair!
ReplyDelete